Moving out of your Seattle home involves more than just packing boxes. You need to handle utilities, update your address, and most importantly, leave the property in pristine condition to recover your security deposit.
We at Bumble Bee Cleaning Services know that move-out cleaning is one of the most overlooked steps in the moving process. This move out checklist Seattle guide walks you through every task you need to complete before handing over your keys.
Essential Tasks Before Moving Day
Get Your Move-Out Timeline Right
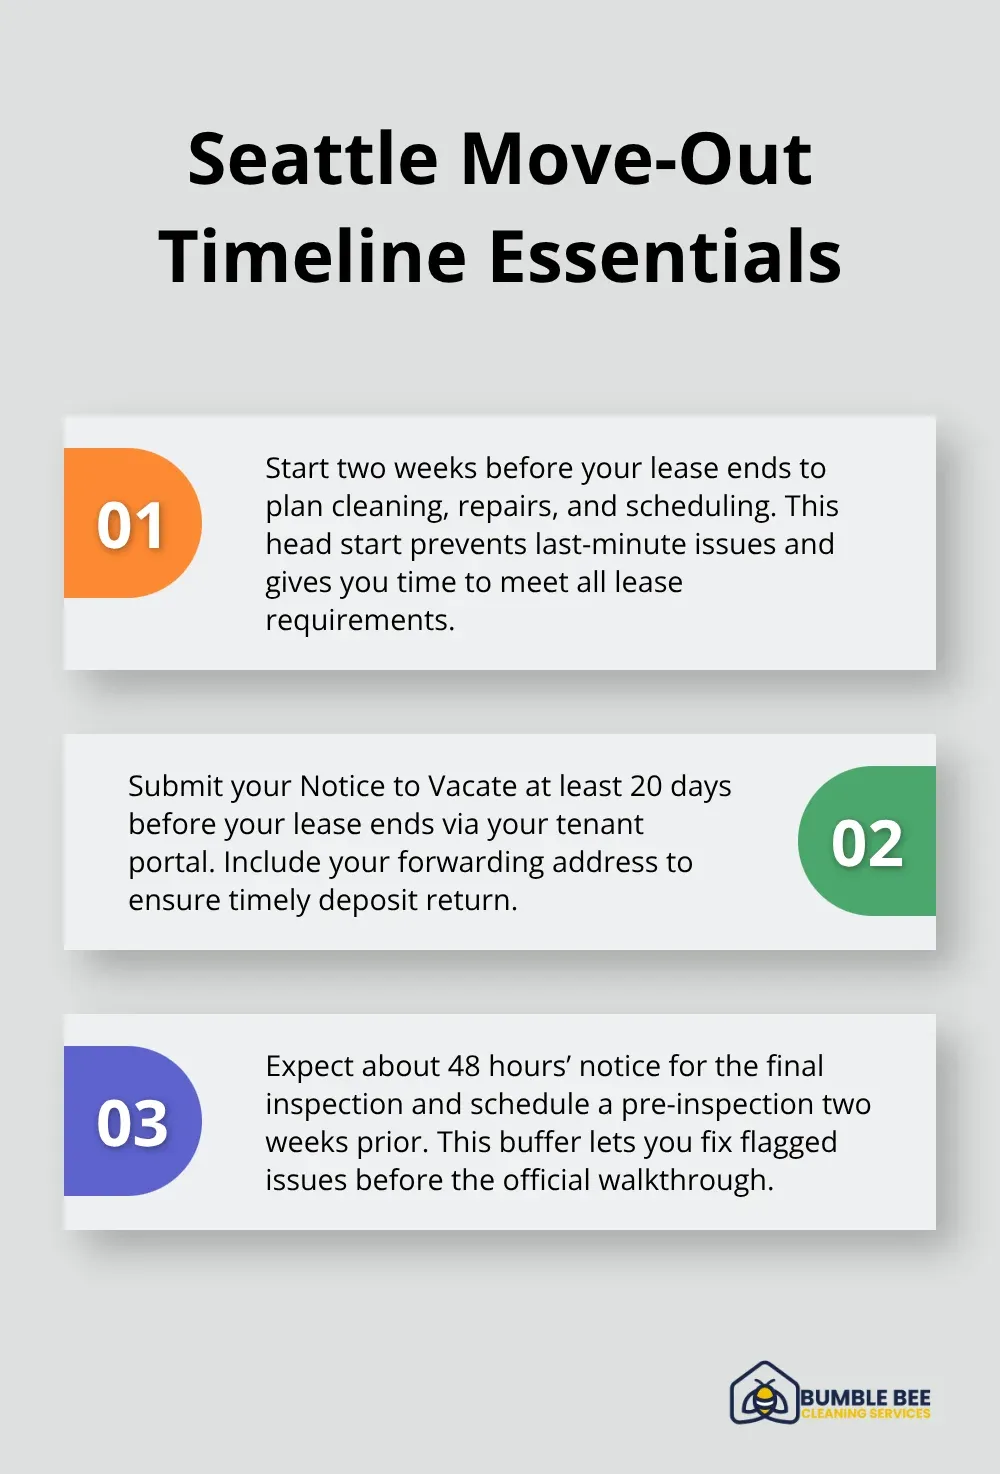
Start your move-out process at least two weeks before your lease ends. Washington State law requires landlords to return security deposits within 30 days and provide an itemized deduction statement for any charges under RCW 59.18.280. This means you have a narrow window to prove the property meets the condition documented at move-in. Contact your landlord immediately to confirm the exact move-out date and any specific cleaning requirements in your lease. Submit your Notice to Vacate at least 20 days before your lease ends through the Tenant Portal and include a forwarding address for deposit return. Most landlords provide 48 hours’ notice before the final move-out inspection, so a pre-inspection about two weeks prior gives you time to fix issues before the official walkthrough. This advance notice protects you and prevents surprise deductions after you’ve already moved out.
Coordinate Utility Transfers and Final Bills
Arrange utility transfers and meter readings at least one week before your move-out date. Contact your water, electric, gas, and internet providers to schedule final readings and disconnection. Utilities should remain in your name through your lease term to avoid landlord disputes. Water and sewer may be billed by the management company and deducted from your deposit, so confirm final balances immediately. If you use autopay for utilities, deactivate it now to prevent overpayments. The management company cannot cancel portal payments and will issue a check refund within 10 days if you overpay. Pay any final utility balances before moving out to avoid collection issues that could damage your rental references.
Schedule Professional Cleaning Now, Not Later
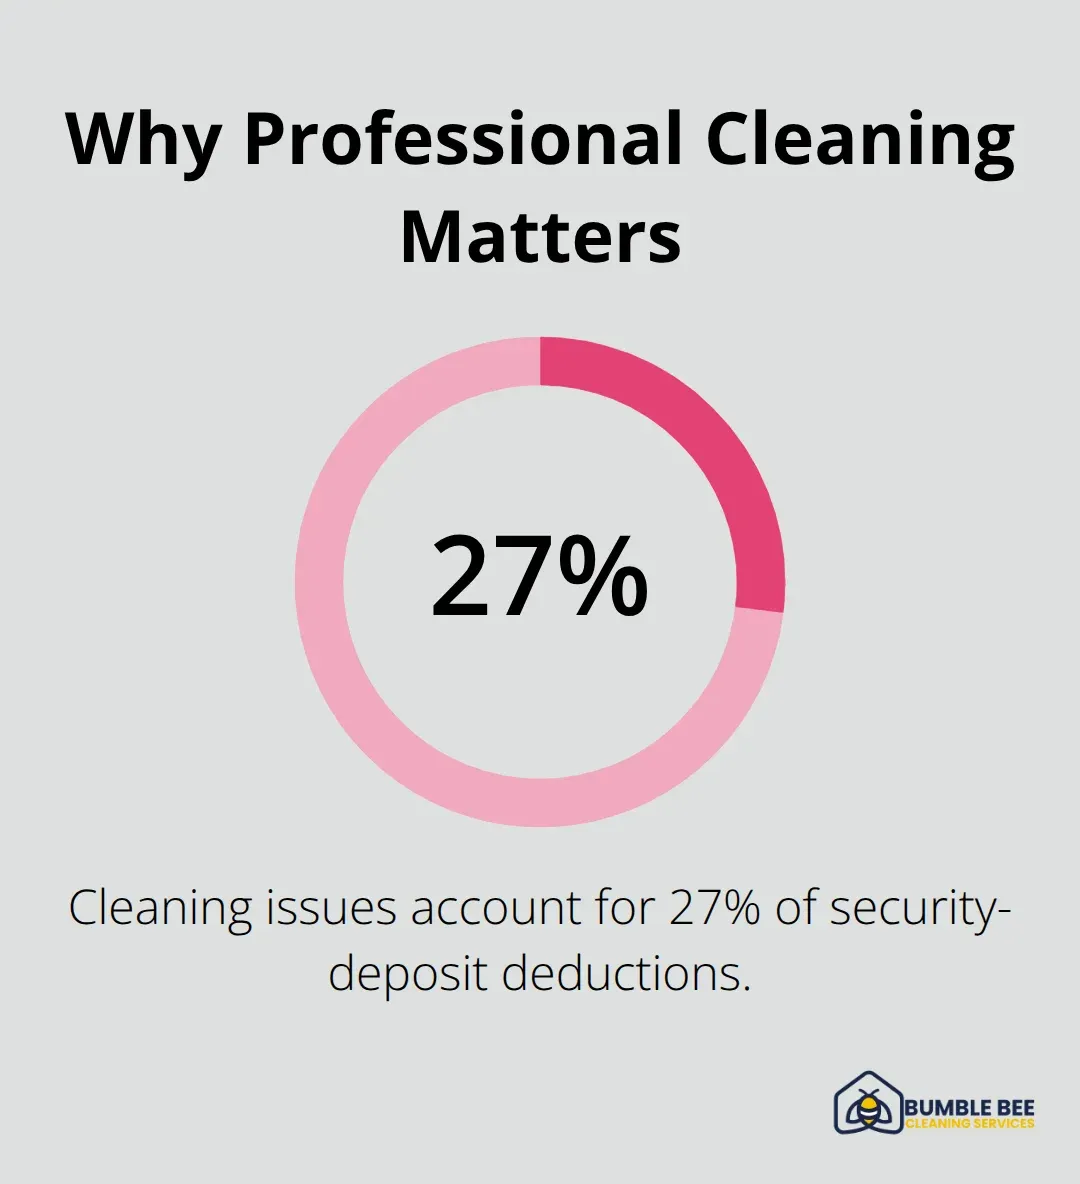
Booking professional move-out cleaning during peak moving season requires advance scheduling. Professional move-out cleaning costs between $120 and $420, based on your home size, condition, and cleaning level. A professional team finishes a standard apartment in 3 to 4 hours, whereas DIY cleaning takes 10 to 15 hours for a typical two-bedroom apartment. Professional documentation proves you met the move-in condition standard, making it harder for landlords to challenge cleaning-related charges. Cleaning issues account for about 27 percent of security-deposit deductions, making it the second-largest cause after damage charges, so professional verification protects your deposit.
With documented before-and-after photos, you strengthen your defense against questionable deductions and establish clear proof of the property’s condition at move-out.
Room-by-Room Deep Cleaning Strategy
Kitchen: The Most Scrutinized Space
Kitchen cleaning demands the most attention during move-out because landlords scrutinize it harder than any other room. Start by cleaning behind and underneath all appliances where grease and dust accumulate over months or years. Wipe down the stovetop, oven interior and exterior, range hood including the filter, microwave, dishwasher, and refrigerator inside and out. Clean cabinet interiors and exteriors thoroughly, then wipe countertops and backsplash to remove grease splatters and stains. Wash the sink and faucet with a disinfectant, ensuring no water spots remain on chrome fixtures. According to ISSA Residential Cleaning Standards, kitchens rank as the top priority for move-out inspections because they show the most visible wear. Empty all garbage and vacuum or mop the floor last to catch any debris from cleaning.
Bathrooms: Aggressive Sanitization Required
Bathrooms rank equally high in landlord assessments and require aggressive sanitization to pass inspection. Clean and sanitize the tub or shower walls, glass doors, and grout lines with a bathroom-specific cleaner. Sanitize the sink, toilet bowl interior and exterior, and all fixtures until they shine. Wipe cabinet interiors and exteriors, clean mirrors to remove streaks, and dust all surfaces including baseboards and windowsills. Address any mold or mildew spots immediately using a mold-specific product rather than bleach, which can damage some surfaces.
Bedrooms, Living Areas, and Carpets: Systematic Attention
Bedrooms, living areas, and carpets need systematic attention to avoid deposit deductions. Dust all surfaces including shelves, frames, light fixtures, and corners where dust bunnies hide. Clean closet interiors and exteriors, wipe baseboards and doorframes, and remove any marks or scuffs from walls. Vacuum carpets thoroughly, then address stains or burns that exceed normal wear and tear. Washington State law distinguishes between normal wear and damage you caused, so carpet stains, burns, or pet damage are your responsibility while general color fading is not. If your lease requires professional carpet cleaning, hire a certified professional rather than attempting it yourself because improper cleaning can void your deposit claim.
Floors and Windows: High-Impact Details
Hardwood or tile floors need vacuuming first, then damp-mopping with appropriate floor cleaner to remove all residue. For windows, clean interior sills and tracks thoroughly as landlords often check these overlooked areas during final walkthroughs. Vacuum or sweep living areas multiple times, focusing on high-traffic zones like hallways and entryways where dirt accumulates most visibly.
Documentation: Protect Your Deposit
Take before-and-after photos of each room after cleaning to document your work and protect yourself against false cleaning-related deductions. This photographic evidence becomes critical when landlords assess whether you met the move-in condition standard. With clear documentation in hand, you’re ready to address any remaining damage or repairs before the final walkthrough inspection.
Protect Your Deposit With Documentation and Strategic Repairs
Photograph Every Room Before and After Cleaning
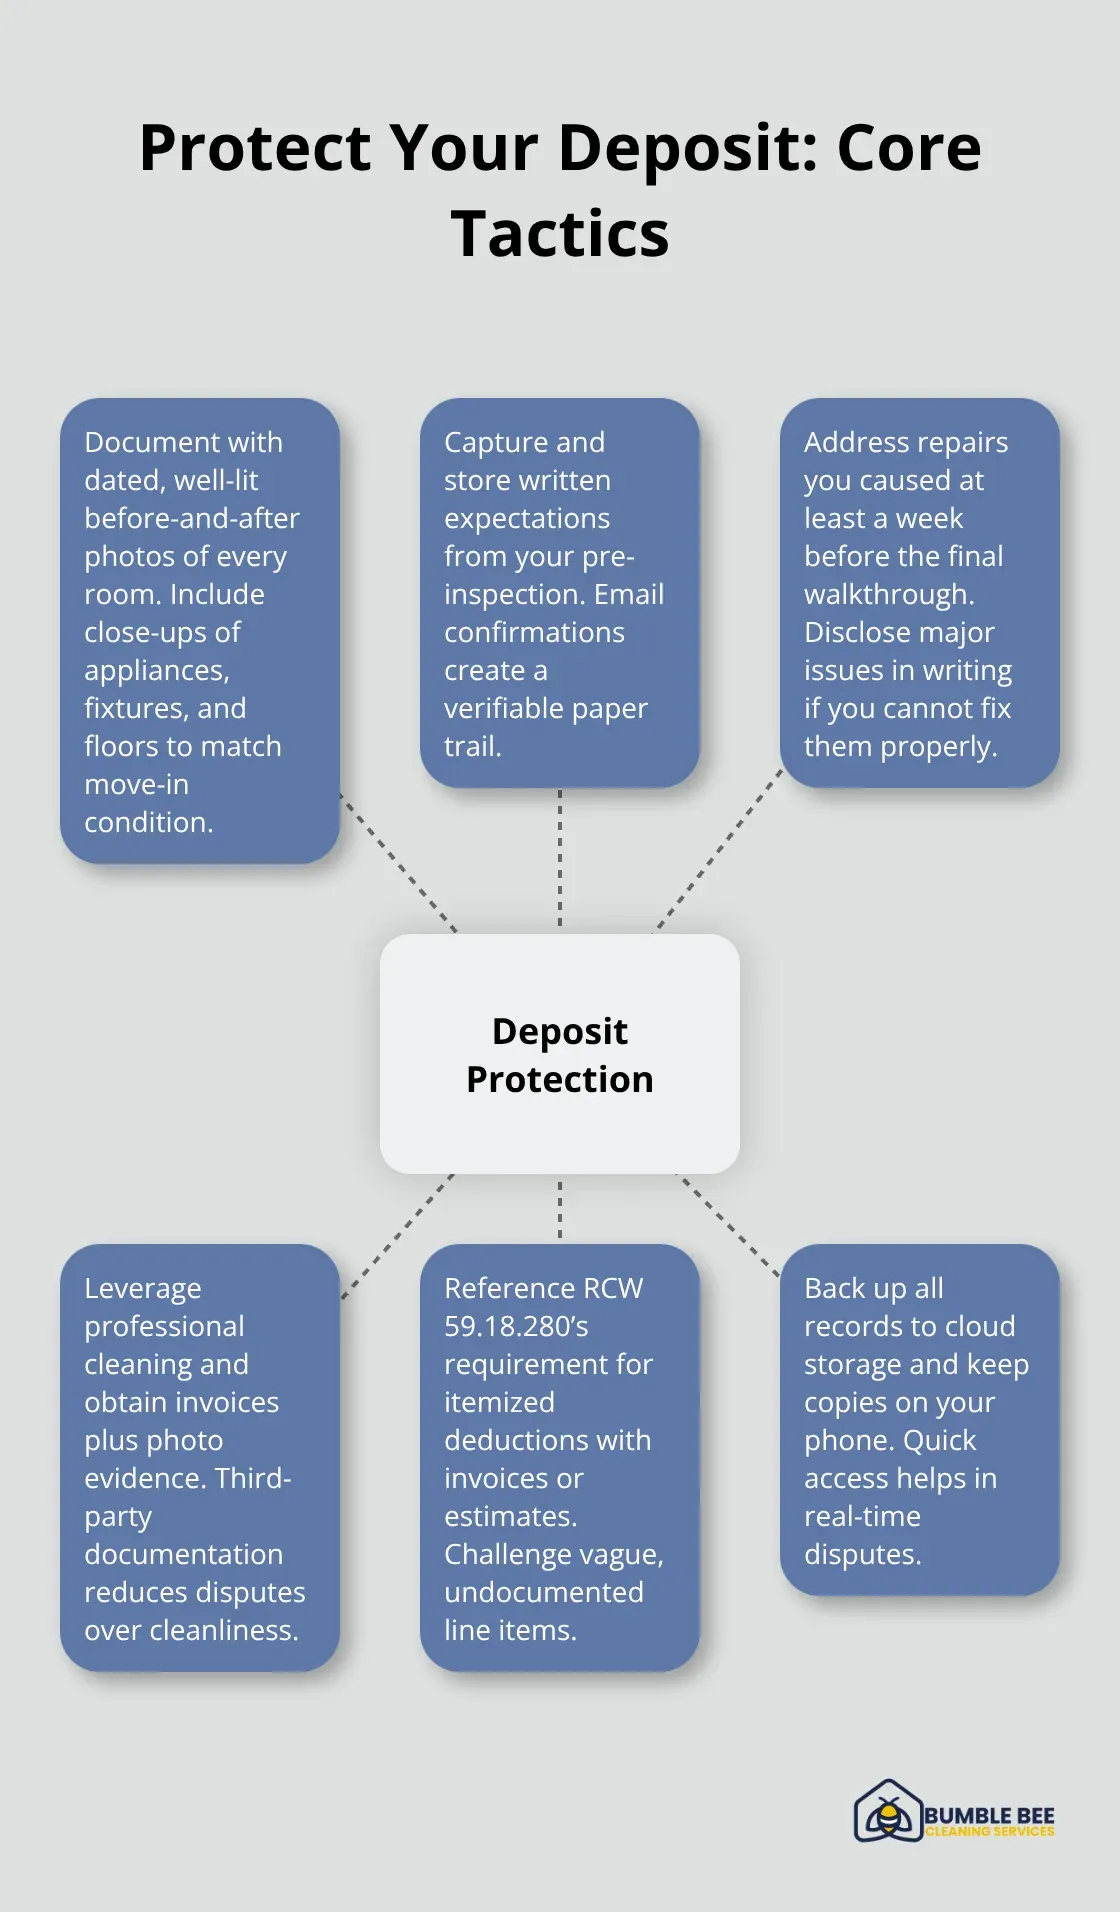
Photographs of your property before and after cleaning serve as your strongest defense against inflated deductions. Take dated photos of every room from multiple angles immediately after you finish cleaning, while the space remains empty and well-lit. Include close-ups of appliances, countertops, fixtures, and floors to show they meet move-in condition standards. Washington State law requires landlords to provide itemized deductions with attached invoices and estimates under RCW 59.18.280, but vague line items without documentation are legally questionable and can be challenged. Your photos create a documented record that proves you met the conditional standard, meaning you matched the exact condition documented at move-in rather than some generic cleanliness level. If your move-in inspection showed a spotless kitchen, your move-out photos must show the same. Store these photos on your phone, email them to yourself, and back them up to cloud storage so you have them ready if disputes arise.
Create a Written Record of Your Landlord’s Expectations
Request that your landlord provide a written list of any concerns during your pre-inspection walkthrough so you have clear expectations rather than guessing what might trigger deductions. Schedule your pre-inspection walkthrough with your landlord two weeks before your lease ends to identify any issues they might flag during the final inspection. This advance walkthrough gives you time to address concerns without rushing or paying for repairs after you’ve moved out. Document this pre-inspection conversation in writing and keep copies for your records (email confirmation works well). When you schedule the final move-out inspection after you’ve vacated and returned all keys, the property should be rent-ready and completely cleaned. Document this final inspection with photos as well, capturing the empty, clean space as your landlord sees it.
Repair Damage Early and Properly
Address damage early with proper repairs at least one week before your final walkthrough to avoid last-minute scrambling. Patch nail holes, touch up paint scuffs, and fix loose fixtures or handles that you damaged during your tenancy. Do not use spackle for significant wall damage because improper patching will be obvious during inspection and may result in full wall repainting charges at your expense. If you caused damage you cannot repair yourself, contact your landlord in writing immediately to discuss repair options and costs before move-out. This written communication protects you by establishing that you disclosed the damage rather than attempting to hide it. Professional photographic evidence becomes invaluable when landlords assess whether cleaning-related charges are legitimate or excessive.
Final Thoughts
Your move-out checklist Seattle success hinges on three actions: start early, clean thoroughly, and document everything. Washington State law gives landlords 30 days to return your security deposit with itemized deductions, so your preparation timeline directly affects your money. Cleaning issues account for 27 percent of security-deposit deductions, making it the second-largest cause after damage charges, which means this step protects your deposit recovery.
Professional move-out cleaning finishes a standard apartment in 3 to 4 hours compared to 10 to 15 hours of DIY work, saving you time while providing documented proof that you met move-in condition standards. Before-and-after photos from professional cleaners create evidence that landlords cannot easily dispute, especially when paired with your own documentation of the property’s condition at move-in. This combination of professional work and clear records makes it significantly harder for landlords to justify cleaning-related deductions.
Contact Bumble Bee Cleaning Services to schedule your move-out clean at least two weeks before your lease ends. We provide flat-rate pricing with no hidden fees and stand behind our work with a quality guarantee. Combine professional cleaning with your own documentation efforts, and you’ll move out of your Seattle home with confidence that your security deposit stays in your pocket.
For more information about our cleaning services in Seattle and Atlanta, or to request a cleaning quote, call or text us at 425-786-1360 or email us at info@qbclean.com