Having a large mirror in your home is not only aesthetically pleasing, but it also makes your home look bigger than it actually is. However, when you don’t regularly clean your mirror, it can easily become a dirt trap with cobwebs and grime.
This is especially true if you have an antique mirror or a wooden framed mirror that has been exposed to dust and dirt for a long time. A dirty mirror can make your home feel claustrophobic and creepy—the exact opposite of what you want from a space that’s meant to reflect light and positivity.
That’s why cleaning a mirror should be on every homeowner’s checklist as soon as possible! Thankfully, cleaning a mirror is not difficult at all. Listed below are some easy steps to follow on how to clean a mirror.
Why Should You Clean Your Mirror Regularly?
You might be wondering: Why would I clean my mirror if it’s already clean?
The reason is simple. Dirt and grime can build up on the mirror’s surface over time and can make your mirror dirty over a short period of time. If you’re cleaning your mirror regularly, you can eliminate the risk of having a dirty mirror that can create an unpleasant and unhealthy environment.
A clean mirror can also extend the life of your mirror by reducing the risk of breakage and cracking. Regular cleaning is also a good way to check up on your home and make sure everything is in good condition.
Scratches on your mirrors can look unattractive, especially if you have a large mirror that’s visible from a distance.
What You’ll Need for Mirror Cleaning
When cleaning a mirror, you don’t need a whole lot of products to get the job done. Depending on the type of mirror you have and the amount of grime on the surface, you may only need a microfiber cloth, a little bit of water, and some alcohol.
If you have a wooden framed mirror, you can add a cup of vinegar to the mix to help break down the grime as well. A large mirror can be difficult to clean if you don’t have the right tools to do so.
That’s why it’s important to have the right supplies on hand before you begin cleaning your mirror. You may want to consider investing in a handheld mirror cleaning tool if you have a large mirror that’s difficult to clean.
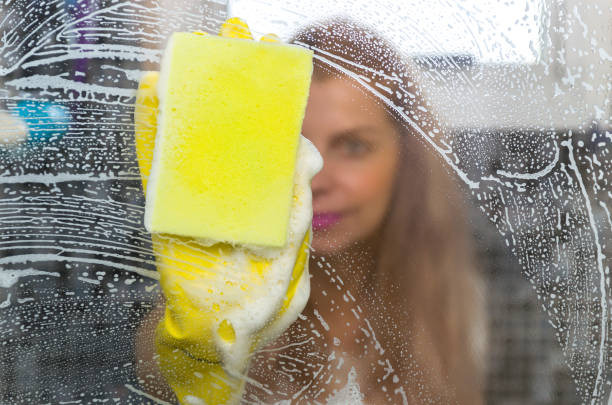
Step 1: Wipe Down The Mirror With A Microfiber Cloth
Begin cleaning your mirror by wiping down the mirror’s surface with a microfiber cloth. Wipe the entire surface of the mirror in downward strokes. The microfiber cloth can help remove most dirt and loose grime from your mirror’s surface.
Step 2: Mix Equal Parts Of Water And Vinegar
For stubborn grime on your mirror’s surface, mix equal parts of water and vinegar. Vinegar has excellent cleaning properties, and it can remove grime from your mirror’s surface.
Pour the vinegar and water mixture into a spray bottle, and then spray the mixture onto your mirror’s surface.
Let the mixture sit for a few minutes to loosen the grime, and then wipe it off with a microfiber cloth.
Step 3: Use Rubbing Alcohol to Remove Sticky Grime
There are some stains on your mirror that even vinegar can’t remove — especially hard water stains. If your mirror is stained with hard water, you’ll want to use rubbing alcohol to scrub it away.
Rubbing alcohol is a great degreaser that can cut through hard water stains with ease. Simply fill a spray bottle with a 50/50 mix of rubbing alcohol and water, and use the solution to scrub the stains away.
After scrubbing away the hard water stains, use a soft sponge or a microfiber cloth to wipe down the mirror. You want to make sure there are no chemicals or cleaning products left on the mirror. Wipe down your mirror with rubbing alcohol one last time, and leave it to air dry completely.
Step 4: Apply Silicone-Based Window Cleaner
If your mirror is framed with glass and you don’t have a wooden framed mirror, you can apply silicone-based window cleaner to the frame.
Wipe the cleaner against the frame’s surface with a cotton rag, and then let it sit for a few minutes before wiping it off. You can also use newspaper as a surface scrubber if you have a wooden framed mirror.
Step 5: Finally, Wipe Down The Mirror With A Dry Towel.
After you’ve finished cleaning your mirror, you can use a clean, dry towel to dry the mirror’s surface. Make sure to dry the towel before using it. This will help prevent the towel from leaving lint behind on your mirror’s surface.
After drying the mirror, you can also use a soft clean cloth to buff away any remaining streaks or marks on the mirror’s surface. Your mirror should now be clean and shiny.
What To Avoid When Cleaning Mirrors
When cleaning a mirror, it is important to avoid using any cleaning solutions that contain ammonia. Ammonia can leave a residue behind on the surface of your mirror and may cause discoloration. This is surprising to most, as trusted mirror solutions can contain ammonia! While it’s ok in moderation, constant use can damage mirror edges and backing. If you prefer an ammonia mix, be sure to wipe all excess off.
Instead, choose a gentle cleanser that leaves no residue. You should also make sure that your hands are clean when you’re working with the mirror. This will help prevent the transfer of bacteria onto the surface.
You must also try not to rub the mirror too hard when you’re wiping down the surface. It’s best to wipe in small circular motions so that you don’t result in any scratches on the surface of the glass.
Hire A Professional Cleaning Service To Clean Your Mirrors!
Finally, if you’re really not comfortable cleaning your mirrors, you can hire a professional cleaning service to do it for you. With online services like Queen Bee Cleaning Service, you can schedule a cleaning service for your home and select which areas you want to be cleaned.
A cleaning service is a great option if you want to clean your mirrors on a regular basis. That’s because hiring a cleaning service can save you a lot of time and effort.
Mirror cleaning is most effective when you do it on a regular basis and before it gets too dirty. Even if you clean your mirrors regularly, an occasional professional cleaning service can make them look like new and give you peace of mind that they’re clean.